Friday, March 18, 2016

Gingerbread Waffles (GF, vegan)


Yum yum!

DELICIOUS GINGERBREAD BELGIANWAFFLES! Perfect for festive winter mornings. Not pictured: I also made these with a Disney Frozen snowflake-shaped Belgian waffle maker that I got for Christmas, and it was phenomenal.

WAFFLES:

1 cup teff flour (or use some all purpose GF)
¼ cup coconut sugar
1 teaspoon baking powder
1 teaspoon cinnamon
1 teaspoon ginger
½ teaspoon nutmeg
¼ teaspoon allspice
¼ teaspoon clove
¼ teaspoon xanthan gum (optional)
¼ teaspoon salt
⅓ cup coconut milk
1 large egg (or 1 flax egg, which is what I used)
2 teaspoons vanilla extract
3 tablespoon agave nectar
3 tablespoon melted coconut oil
      ---> combine ingredients, waffle-ize in your favorite waffle maker (Belgian worked very well)

GLAZE: 

1 cup coconut sugar (powdered, if you want to be picky about consistency)
1 tablespoon coconut milk
1 tablespoon lemon juice
¼ teaspoon vanilla extract
     ---> whisk together. You can also mix these ingredients by taste.

Enjoy!

Tuesday, April 1, 2014

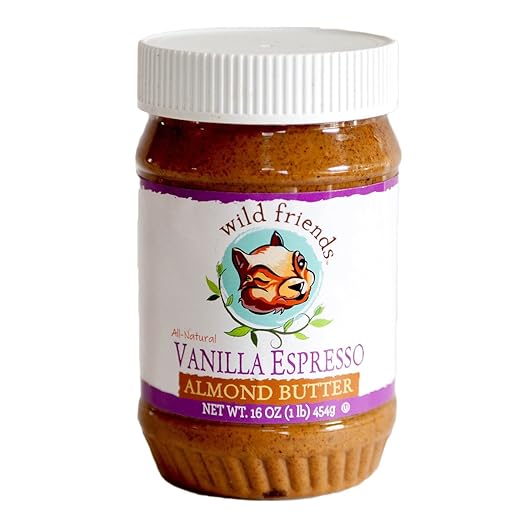
Things that are Awesome: Wild Friends Vanilla Espresso Almond Butter

It's creamy almond butter, sweetened with agave, and enhanced with vanilla and tiny flecks of espresso powder.  If eating this isn't a brilliant start to any morning, I don't know what is.

Try it on everything from waffles to cookies to ice cream.  Or straight out of the jar.  Did I mention it has a WINKING SQUIRREL on its label? because that just makes it infinitely better.

Eat this now.


Saturday, March 1, 2014

AWOL (still)


Yes, I've been AWOL for quite a while.

I was diagnosed with Lyme a year or so ago, and since then I haven't had much time, energy, or motivation to spare.

Call it what you want- Chronic Lyme, Lyme Disease Syndrome, Lyme-MSIDS... it's no party.

"It is estimated that there are up to 300,000 new cases of Lyme disease each year in the U.S. alone. Yet, only around 30,000 of them will properly diagnosed and reported by the Centers for Disease Control (CDC). The CDC themselves admit that the actual cases of Lyme disease could be up to 10 times higher than those reported.
 By the time many Lyme patients are properly diagnosed their health has deteriorated far beyond what the IDSA’s two to four weeks of treatment can fix. Lyme opens the door to other opportunistic infections including additional tick borne illnesses that may have been contracted at the same time as Lyme. Viruses, parasites, candida and other bacterial infections not related to Lyme have taken control of the patients immune system.
Lyme Literate Medical Doctors (LLMDs), who are very hard to come by, tell the newly diagnosed it will be at least two to four years of treatment. There are no guarantees that they will get well though, some are past the point of no return. For many treatment is management, not cure"
- from http://lymelightfoundation.org/about-lyme/what-everyone-should-know/

 For more information, I highly recommend these videos:

Under Our Skin - http://www.underourskin.com/
      watch for free on Hulu: http://www.hulu.com/watch/268761

LymeLight - http://vimeo.com/65479794
       This is the story of Olympic halfpipe skier Angeli Vanlaanen living with Lyme Disease.

I am also happy to share my experiences with treatment (and life) with anyone seeking more information.

And now, a friendly infographic:


Wednesday, April 3, 2013

Mint Chocolate Cake

What I made for St. Patrick's day:

Leprechaun-friendly.  Will trade for pot of gold.

MmmMmm. I made 4 mini cakelets.

THE RECIPE:

Flourless Chocolate Cake:

4 ounces fine bittersweet chocolate -- I used a little under 4 oz unsweetened chocolate, plus ~ 4 tbs coconut sugar
1/2 cup ghee (or other butter substitute)
3/4 cup coconut sugar
3 large eggs
1/2 cup unsweetened cocoa powder
1 1/2 teaspoons vanilla
pinch of salt

---> Preheat oven to 375 degrees. Grease an 8 inch round springform pan, or four 4-inch springform pans.  Line bottom of pan with a round of parchment paper, and grease the paper.
Chop chocolate into small pieces. In a microwave safe bowl, Melt the chocolate over low heat, and stir in butter substitute until they are melted together.
Add cocoa, then whip in eggs, vanilla, and salt.
Pour the batter into cake pan(s).
Bake for ~25 minutes.  Let cool in springform pan.

Mint Frosting:
1 can full-fat coconut milk, chilled. --> scoop the thick coconut fat off the top of the can, after it has chilled. leave the watery stuff behind.
mint extract, to taste (i used ~1/8 tsp)
green food coloring (I usually don't use food coloring.... but i couldn't resist!!)
Add powdered xylitol and erythritol in 1:1 amounts until desired consistency
     Note: to make powdered xylitol/erythritol, add the granulated form to a magic bullet, with a dash of tapioca starch or potato starch.  The starch will help it to 'powder' easily. Bullet until powdered.

Topping:
Shaved mint chocolate bar.
    I used Endangered Species Chocolate, Mint Chocolate and shaved off curls using a vegetable peeler.

Assembly:
After cake has cooled in springform pan, pour frosting on top of cake. Chill until frosting is firm.  Then add chocolate shavings on top of frosting.  Garnish with mint leaves if desired.

To serve, gently remove sides of springform pan, then transfer cake onto serving platter.  Enjoy!

Sunday, February 17, 2013

The Best Chocolate Cookies in the Universe


Note: sandwiching with mint chocolate chip ice cream only makes the best even better.

Best in the Universe? --prove me wrong, I DARE YOU.

They're fudgey, chewy, soft, gooey, crinkley, sweet, and delicious.  (And grain-free, gluten-free, sugar-free, dairy-free, of course.)

Recipe can easily be doubled for twice the aweseomeness.

Adapted from the 2013 Washington Post Christmas cookie section.


THE RECIPE:

Prep:
- toast 2 3/4 c chopped walnuts:  spread them on a baking sheet and place in a 350 degree oven, shaking sheet occassionally, for 8-10 minutes.  Watch carefully to make sure you don't burn them.

- separate 4 large eggs, saving the whites **

- powder 3 cups coconut sugar:  I used a magic bullet blender for this, powdering small amounts at a time.  A Vitamix could probably handle all of it at once and save considerable time.  I put ~1/2 c at a time in the bullet with a pinch of tapioca or potato starch each time, and blended until powdered. Adding starch helps create the 'powdered' consistency.

- locate parchment paper or silicone baking mats to line cookie sheets before dropping cookies.

- heat oven to 350 degrees

[** save those yolks and make some Gluten Free Pasta!! It's no coincidence that a double cookie recipe takes 8 whites, and a double spinach-pasta recipe takes 8 yolks..... :) ]


THE ACTUAL RECIPE:

1/2 c plus 3 tbs cocoa powwder
3 c powdered sugar
pinch of salt
2 3/4 c walnuts, toasted
4 large egg whites, at room temperature
1 tbs vanilla

Combine the cocoa powder, powdered sugar, salt, and walnuts - beat on low for 1 minutes.

With the mixer running, slowly add the egg whites and vanilla.  Beat on medium for 3 minutes, until the mixture has thickened slightly and looks lumpy. Do not over-mix, or the eggwhites will over-thicken.

Use a 2-ounce cookie/ice cream scoop (or let's be honest... a normal spoon) to scoop that batter onto the LINED cookie sheets.  Space cookies about 3 inches apart.

After placing cookies in the oven, immediately reduce temperature to 320.  Bake 15-20 minutes, rotating pans font to back and top to bottom halfway through. (note... this entire step is optional, but is included in the original recipe, and would probably would help for optimal results.)

Pull parchment paper with cookies onto a cooling rack and cool completely before moving cookies.

Eat and enjoy!

Tuesday, February 5, 2013

Gluten Free Pasta Verde, Homemade

Red & Green - this was my Christmas dinner.

 This is an adaption of the previous recipe that I posted on homemade GF pasta. It basically subs pureed spinach for some of the egg, and ends up being bright green! The taste doesn't change very much, so it's still good with a variety of sauces. I've preferred to keep it simple, and top it with a few grape tomatoes sauteed in olive oil, garlic powder, red pepper flakes, salt, and black pepper.

While we're on the subject of olive oil, I highly recommend Trader Joe's Spanish Olive Oil. It is fragrant and rich, not at all bitter, and everything that an EVOO should be! Get it.

I used my Cuisinart pasta maker for this again. I've tried it with the fettuccine dye, as well as the angel hair one. Worked great with both!

When I've made this, I've done a double recipe, and bagged the leftovers to feed myself for the next 10 dinners or so.  Below is the doubled version, because it's easiest to sub the spinach for one whole egg. To make less, I would sub the weight of one egg yolk for equal weight of spinach puree.

Angel hair extruding.
THE RECIPE: (feeds ~8) - (or more, if you're me)

6 oz garbanzo bean flour
6 oz millet flour
6 oz potato starch OR tapioca starch/flour
2 tsp psyllium powder
2 pinch nutmeg
2 tsp salt                           -----> combine dry ingredients (mix them in bowl of pasta maker)

1 L egg
8 L egg yolks*
5 oz fresh spinach leaves    -----> blend eggs and spinach until spinach is pureed. Slowly add to dry mixture and blend.

1 tbs oil (maybe)
1 tbs water (maybe)          -----> after your egg/spinach mixture is fully incorporated into the dry ingredients, evaluate the consistency of your dough.  It should be naturally clumping into walnut-sized chunks. (Although the moisture of the spinach may make it ball a bit more than usual- that is okay.)  If the dough resembles cornmeal, it is too dry.  If this is the case, add up to 1 tbs oil, and re-evaluate. This should be all you need- however, if you find it is still too dry, add up to 1 tbs water.  Get those walnut-ish chunks, one way or another.

Then, follow the instructions on your pasta maker to extrude the noodles. You should also be able to do this by hand-- google elsewhere for detailed instructions on how to do that.

Cook in a very large pot of boiling water for just a few minutes.  Fresh pasta cooks VERY quickly-- and overcooking it will make the noodle structure and shape fall apart. (aka, still tastes good, but looks crummy.)  It always finishes more quickly than I expect!

Top with some olive oil, salt/pepper, or your favorite sauce. Enjoy!

Fettucine in the stew pot!


Fettuccine, just about to be cooked.


~~~~~~~~~~~~~~~~
* STAY TUNED for the dessert that is the PERFECT PAIR to make with or soon after this pasta...... because it uses 8 egg whites! So, it's pretty much a requirement that you make them one after another.  Just don't explode from deliciousness overdoes when you do.


Wednesday, November 21, 2012

Gluten Free Pasta: Homemade

Yeah,  that's right. I made this meal for Girl's Night, and shared it with my non-weird-diet friends! Also.. disregard the overcooked (aka, flattened) ziti.  Still tastes awesome!

My new favorite meal is homemade gluten free pasta.  I have a Cuisinart pasta maker that mixes the dough and expels it out of a die, which makes the whole process super simple.  It should be possible to roll out the dough and cut strips without a pasta maker, too.

I've been using THIS recipe from GlutenFreeGirl. (Scroll down to the recipe in the box.)  I've use garbanzo bean flour instead of garbanzo-fava, and also tapioca starch instead of potato starch.  I did use a baking scale to measure by weight for the flours.

I usually have large eggs (not extra large, as the recipe calls for) at home, so the second time I made the pasta I used 4 egg yolks from large eggs, and 2 large eggs-- it came out the same.  Either way, just adjust the oil and water amounts if it ends up too wet or too dry.


Oozing out of the Cuisinart!
Plate of uncooked pasta.

Seriously, this pasta is delicious.  I eat it with some Spanish olive oil, salt, pepper, and a little basil. --Delish!

~~~~~~

Also:
I found this at my local Healthway:


Conte's frozen gluten free potato gnocchi.  Cooked up in under 10 minutes... I don't get insta-meals very often, so this was awesome. Pretty darn good, too!

Saturday, October 20, 2012

Pumpkin Madness!


Pumpkin snickerdoodles!

A new post? Shocking, right-- seeing as I've been completely AWOL for a very long time.... sorry about that. This week I got caught up in the fall pumpkin-everything craze!  It started with pumpkin snickerdoodles and then progressed to pumpkin-sauce pasta. I still have some pumpkin left in the can... so there may be some pumpkin pancakes in store for tomorrow morning.

I still have been being food-lazy, so I mainly used other peoples' recipes for these creations.  I made the pumpkin snickerdoodles using the awesome recipe on The Nourishing Gourmet.  They are definitely some of my favorite cookies ever!! The pumpkin gives them a delightfully fluffy texture.

In the recipe, I used coconut sugar for the sweetener.  For gluten-free flour, I used 1 cup millet flour, and 1 cup of mixed garbanzo flour and brown rice flower.  I also threw in about 1/4 or 1/2 tsp guar gum for good measure.  I also added Enjoy Life mini chocolate chips to half of the batter...... but those do have cane sugar in them. (I was feeling adventurous!)  I love the combination of pumpkin and chocolate, but these cookies were so good they barely needed the addition.


Pumpkin (sauce) pasta

Now, for the pasta, I cooked up some gluten-free brown rice penne and twisty things (don't know the proper pasta-name!) and whipped up some pumpkin sauce with the left-over canned pumpkin.

I really just made the sauce by taste, and followed the basic seasonings listed here. The base was pumpkin, olive oil, almond milk, and pasta water.  The seasonings were salt, pepper, sage, onion powder, garlic powder, nutmeg, and cinnamon.  It ended up having a great blend of savory taste, plus the implied sweetness of the touch of cinnamon.  Definitely also a winning creation.

Happy fall! Now the big question.... what are you being for Halloween???


Tuesday, July 24, 2012

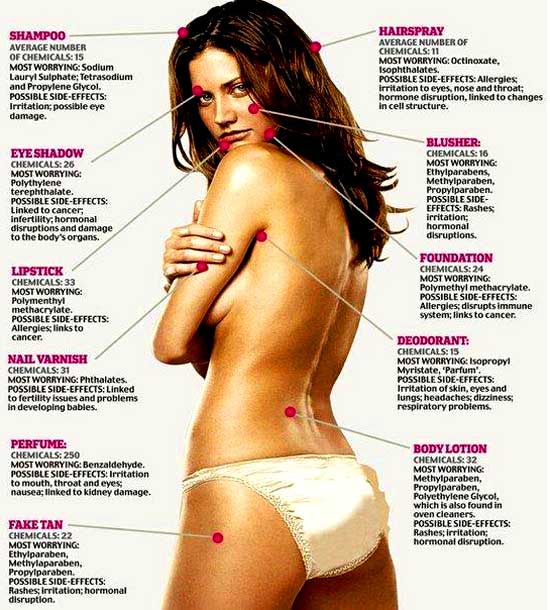
EWG Cosmetics Database

"HEY GRRL! My makeup's probably toxic!"


Here's a useful site that you can use to look up cosmetics and toiletries to see whether their ingredients pose heath risks. It's created by the Environmental Working Group, and rates products from 0 (good) to 9 (bad!), and includes a breakdown of what ingredients pose specific risks.

EWG Cosmetics Database 

You might not WANT to know the risks of the products you're using... but it's good to know that this site exists!

I looked up a few of my favorite items, ranging from....


Ocean Potion SPF "XTREME" Tanning Oil  --- rated 7 (that's bad), with a high risk of "Developmental and Reproductive Toxicity"

 - Honestly, that's no big surprise. Nothing about this stuff looks healthy to begin with. It is "XTREME," after all!


to...


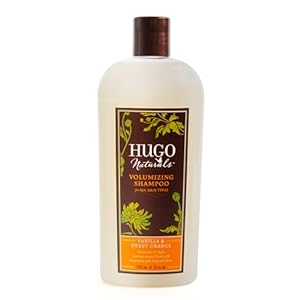
Hugo Natural's Volumizing Shampoo --- rated 1 (that's good!)

- Granted, 75% of the time I wash my hair I use my Pantene 2-in-1 (rated 4)... but I did at least buy the Hugo's to go in the right direction!

Friday, April 13, 2012

Chocolate Easter Bunny

Yes, it's belated. But pour it into a different mold, and it can be chocolate whatever-you-want!

Hi, I'm cute! Also, delicious!
 THE RECIPE:

2 oz unsweetened baker's chocolate
1 tbs coconut oil  (I used the kind that doesn't taste like coconut to make it more standard-chocolate-y)
1 tbs agave (or stevia to taste)

Melt and mix - then pour into a candy mold!
If you're feeling fancy, try to temper your chocolate... I wasn't, so I didn't.

Almost-deaf.

Thursday, April 12, 2012

Also: Two Cool Things

 
#1 - Earthing.    http://www.hindawi.com/journals/jeph/2012/291541/

Ever noticed feeling brighter after walking outside barefoot? (Or do you even go barefoot anymore?) - I know it always helps me to gain energy by "reconnecting" with nature and the Earth.  This research is really interesting to me, and is producing a whole new idea of "Earthing" -- purposely grounding one's body by connecting into the electrically grounded surface of the earth.


When I google "fitness," this is the first image that comes up. ...ironic?
#2 - SlimKicker!   http://www.slimkicker.com

This is an awesome website that helps boost motivation for reaching health goals- in nutrition, exercise, and emotions. You "level up" as you earn points by logging your progress and completing health challenges.  It's just what I need to get my competitive spirit engaged!  Super easy to use, fun to get your friends to do it with you, and helpful to track nutrition stats!  (friend me on it- I'm mcphilli!)

The Sticky Bun Experience


 Also known as, How I Spent My Easter:


Sticky Bun: aka, giant brick of sweet, rich, caramely decadence.

I made Pecan Sticky Buns, invented from a recipe in April's Bon Apetit magazine.  Problem is, they somehow ended up taking half the day to make!  This was pretty much due to a few "mishaps" that occurred along the way.  In the future, I will also make everything the night before, roll them out, and then will only need to slice and bake them in the morning.


At any rate, these turned out sinfully rich, sweet and delicious.  Since I didn't use yeast in the recipe, they have a more flakey than doughy consistency, but still fine nonetheless. 

This recipe has three parts: the dough, the filling, and the topping/glaze.  Before I go into the making of them, let me explain the "mishaps" that I had. 

1. First of all, gluten-free flour must absorb less water than normal flour. (Maybe? Let's blame it on that?) - I added less milk than called for to my batter at the last step, yet still turned it to a sticky, unrollable mess.  So, I had to keep adding more and more flour....  I was already making a double recipe, so this nearly made my mixer bowl overflow.  (It also prompted some delirious song... "25 gallons of sticky bun dough, 25 gallons of dough.... add some flour, mix it around, 26 gallons of sticky bun dough.....")  After adding about a cup, I gave up, threw it in the fridge, and it ended up fine after chilling.

2. Second major issue-- Bon Apetit recipe calls for 1 cup of the glaze to be poured into the pan before putting the raw buns in, before cooking.  I somehow missed the "1 cup" part, so I dumped the whole pot in.  This led to sticky buns swimming in a pool of caramel sauce.  When I realized my mistake, I tried to pour some out.... this did not end well either. (Actually it was fine- but sticky buns were still baked in WAY more glaze than necessary!) - So that one definitely changed the final product.

The moral of the story is, they're still delicious, even if you mess up a little. (Or "improvise!")

Without further ado....

THE RECIPE:

DOUGH:
1/2 c millet flour
1/2 c brown rice flour
1/2 c tapioca flour
1/2 c potato starch
3/4 c all-purpose GF flour
1.5 tsp guar gum
2 tsp baking powder
5 tbs coconut sugar
1 tsp sea salt                       --> combine dry ingredients, stir to mix

2 large eggs                        --> break into a cup, whisk until smooth
~1/3 c almond milk-- or less!
1/4 c ghee
1/4 c coconut oil  (soft, but not melted)

Place dry ingredients in the bowl of a stand mixer fitted with a dough hook. (Dough hook is probably optional, especially since we're not using a yeast dough... but I used one anyway)  Gradually add all eggs, and about 1/4 c almond milk. Add milk slowly until dough is moist enough, but not too wet to roll.  Mix in butter a little bit at a time.  Mix on medium speed for ~5 minutes.  Place in refrigerator to chill (2-3 hrs).

FILLING:
1/4 c ghee
1/4 c coconut oil  (soft, not melted)
1/2 c coconut sugar
ROLL OUT!
3/4 tsp cinnamon
1/2 tsp nutmeg
1/2 tsp salt

Mix all ingredients using an electric mixer on high speed, beating until light and fluffy, 2-3 mins.  Set aside.

TOPPING/GLAZE

1 3/4 c chopped pecans, toasted     (toast on a cookie sheet in oven, if not pre-toasted: 10-12 mins at 350)
1/4 c coconut oil
1/4 c ghee
3/4 c coconut sugar
1/3 c agave
2/3 c almond milk + 2 tbs soymilk powder + 1/8 tsp guar gum  (= "heavy cream" substitute!)
1/4 tsp salt
1/4 tsp finely grated orange zest (optional- I did one batch with, one without-- both great!)

Melt oil/ghee in a small heavy saucepan over medium heat. Stir in all other ingredients. (Coconut sugar will probably separate out/turn tar-like... this is okay! Proceed!)  Bring to a boil, reduce heat to medium, and simmer for 3-4 minutes.  (MAGIC!) Sauce should be uniform, glossy, and smell (/taste) like caramel. :)
What NOT to do: pour entire pot of glaze into pan.

ASSEMBLY:
Pour ONE CUP :) of glaze into a 8x8 baking pan, and tilt to coat sides. Set aside the rest for later use.  Sprinkle 1/2 c toasted pecans over bottom of baking pan, and let cool.

Roll out dough- I recommend between 2 sheets of waxed paper, or between two silicone rolling sheets.  Either way, flour surface liberally (I used brown rice flour.) Roll into a 12"x16" rectangle, about 1/4" thick, with the long side facing you.  Spread the filling over the rectangle, leaving a 1" plane border on the edge farthest from you (so it doesn't goo-out post-rolling!)

Sprinkle 3/4 c chopped pecans over filling.

Starting with the long edge closest to you, roll up the dough, trying to tighten as you go.  Use a metal knife/spatula to help free it if necessary.  Pinch long seam together when rolled. Pat open ends to make them flat (un-tapered). Arrange log seam-side-down.

Buns swimming in glaze.... yummo!
Use a knife to slice log into 9 pieces (buns)... or more if you want lots of shorter ones! (but then you will need more pans... possibly with more glaze in them....)  Turn buns cut-side up, and pat top to flatten slightly.  To make a bun more round in shape, cup it in floured hands, and gently push and turn it in a circular motion. 

Place buns in prepared pan, evenly spaced, and preferably not touching.

Preheat oven to 350, with a middle rack available. Whisk one egg with 1/2 tsp water in a bowl, and brush tops of buns with egg wash.  Bake for ~50 minutes, "rotating pan halfway through and tenting with foil if browning too quickly" (--yeah right Bon Apetit, I did neither of those two things).  Buns should be golden-brown, and filling (/glaze goo) should be bubbling.

Let cool for 5 minutes, then spoon remaining glaze over them.  Sprinkle on remaining 1/2 pecans, then let cool completely.  --Bon Apetit also says to lightly sprinkle sea salt over them. I forgot to do this, but I think it would be good! --> so let's say sea salt optional.

THE END!

Outta the oven.  Maybe more like Sticky-Bun-Loaf... but delicious all the same.


For me, the experience of making these was equally important as the outcome.

(Sadly, I can barely eat the outcome, as they're just so darn sweet and rich! ..and probably calorie rich too... oh well!)

Oh oh and you know what my favorite part was??? Making the glaze taught me that coconut sugar does indeed caramelize, and if you boil it with almond milk./agave, it WILL melt! (contrary to its low-heat tar-like behavior!) Yay!

Sunday, March 25, 2012

Waffle Cookies! (Wookies?)

Waffleization #1: Chocolate Oatmeal Waffle-Cookies!

Look like waffles, taste like cookies. True Waffleization.

Waffleized cookies are cookie batter cooked in a waffle iron.  I whipped up some chocolate-oatmeal batter, and popped it in my belgian waffle maker... instant waffle-cookies! (wookies?)

THE RECIPE:

1 c flour  (1/4 all-purpose GF, 1/4 brown rice, 1/4 c millet, 1/4 c GF oat)
3/4 c GF oats

1/2 tsp baking powder
3/8 tsp salt
1/4 tsp cinnamon
1/8 tsp nutmeg
3 Tbs cocoa powder
1 Tbs cacao nibs (optional)

1/4 c coconut oil
1/4 c agave
1/4 c coconut sugar
1 egg
1/2 tsp vanilla

Combine dry ingredients in a bowl, and separately whisk together all wet ingredients in a large bowl. Add dry ingredients, and stir/beat until well combined. (I did it by hand using a wooden spatula/paddle thingy.)  The batter should be cookie-consistency: Holds its form, but still moist/a little sticky.

Fire up the waffle iron! I used a medium-high setting, but still needed to watch them carefully.  It's a balance between cooking them long enough that they're firm enough to be removed in one piece, but also not cooking them too long/too high that the outside burns.  A little bit of dark toastiness is fine, and to be expected. The inside will still be gooier than the outside, which is also fine (and delicious)!

Scoop on blobs of the batter, and flatten them slightly.  I chose not to make them full-waffle sized, but any size should work.  Since I didn't fill the griddle, my "green light" was going off before the waffle-cookies were truly all the way done... so as I said, I had to check them to see when they were really done.

Overall, this worked very well! They taste just like normal cookies, but have the added benefits of being (a) waffle-shaped (thus possibly still passing as breakfast), and (b) TWICE AS BIG as normal cookies (thus allowing you to eat twice as much). :)

SUCCESS! Wookies rock.

Saturday, March 24, 2012

"The Waffleizer"

I found a new favorite blog, and just in time for International Waffle Day (or, if you're Swedish, VÃ¥ffeldagen!), which is March 25th.


Creations of THE WAFFLEIZER: http://www.waffleizer.com/

 It is... "The Waffleizer," and features its author, Dan, experimenting with waffle-izing many every-day foods.  These range from macaroni and cheese, to hamburgers, to crepes, to (my personal favorite) bibimbaffle.  (That's waffle-ized bibimbap, a Korean rice/egg/veggies dish)

I must say, it's pretty inspirational. Waffleizing will begin tomorrow!! Stay tuned, and fire up the iron.


Saturday, March 17, 2012

Part 2 - Brownies w/ Irish Creme Frosting


I used the recipe from my Chocolate Raspberry Truffle Cake, but doubled it and baked it in a 9x13 pan.  And then made Irish Creme Frosting using flavored agave. (What I REALLY wanted to do was incorporate whiskey flavor using my whiskey flavored tea from Scotland.... but then I forgot it at work!)

Preheat oven to 350 degrees. Grease a 9x13 pan.

THE RECIPE:

1 c coconut oil
1/2 c ghee (or more coconut oil)
2 c coconut sugar
1/2 c light agave          ---> if oil is solid, heat on stove until melted; whisk together/stir continuously. Let cool slightly.  (the components may remain separate, but that's okay for now)

4 eggs
2 tsp vanilla    ---> after wet ingredients cool slightly, whisk in eggs and vanilla. At this point, stir until all ingredients are mixed.


Combine in a separate bowl:


1 1/3 c flour combination: oat, GF all-purpose, brown rice, millet, tapioca  (basically whatever you have!)
1/2 tsp guar gum
1 tsp baking powder
1 tsp salt
1 c cocoa powder    ---> combine dry ingredients in a bowl, then add them to the wet ingredients. Mix well.
Pour batter into pan, and bake ~30 minutes, or until toothpick inserted into center comes out clean. Let cool.

IRISH CREME FROSTING:
I made this in a very small quantity, since I'm basically out of irish creme agave. Multiply the proportions as necessary:
1/4 c coconut oil  (softened, but not melted)
1/4 c irish creme agave   ---> whisk together until frothy/creamy
1 tbs cocoa (or more/less to taste)
1/8 tsp lemon juice (makes it less sweet)
If you want it thicker, place in fridge for a while.

Happy St. Patrick's Day! - Savory Basil Pancakes

I'm back!


After a long hiatus, I'm ready to start making fun food again. For St. Patrick's day lunch today, I made "green" shamrock savory pancakes.  They aren't really green in color, but they COULD be, if the basil/spinach that they contain were pureed. I based the batter off of my standard waffle recipe proportions, and threw in the greens.  Here's how it worked:

THE RECIPE:

Combine in a 2c measuring cup:
1 egg   -----> beat with fork
1 tbs extra virgin olive oil   ---> beat into egg
1 cup almond milk      ------> add and stir
1 c fresh basil leaves, chopped
1/2 c baby spinach leaves, chopped
a few sprigs of lavender leaves, chopped  ---> add all chopped greens
1/8 tsp salt (or to taste- should taste a bit salty)
dash pepper
2 dash onion powder
dash garlic powder  ----> add all seasonings, stirr
1/2 c garbanzo bean flour
1/2 c amaranth flour       ---> combine and stir. (millet instead of amaranth would also work, or all garbanzo)


Cook on a non-stick frying pan. To make a shamrock shape, pour four small circles of batter in the pan, and let them blend together in the center. Spread with ghee or EarthBalance, and top with avocado slices.


International Waffle Day Update:  this recipe is also AWESOME as waffles!!!!!


Sunday, January 1, 2012

Povitica v.2.0

Yum yum yum yum yum!

Much tastier version than the last, albeit not quite as authentic as far as the thin-rolling goes.

The following recipe makes FOUR LOAVES plus a bit extra filling.


THE RECIPE:

Dough:  Cream together...

1/2 c coconut oil
1/2 c ghee
1.5 c coconut sugar
4 eggs
1/2 c brown rice syrup

Mix and add....

2 c brown rice flour
1/2 c garbanzo bean flour
2 c millet flour
1 c gluten-free oat flour
1 c tapioca flour
3 tsp baking powder
1 tsp salt


Filling:   Melt together...

1.5 c ghee
1.5 c almond mulk
1 c agave nectar
1 lb ground walnuts
3 tbs cinnamon
2 tsp guar gum (to thicken)


Separate the dough into four quarters- one for each loaf.  Roll out one portion between plastic. Spread cooled filling onto dough, then roll dough. Fit each portion into a greased loaf pan.  Bake at 350 for ~40 minutes.

Slice and enjoy!


Gingerbread S'mores Cookies


Happy New Year!

I know I've continued to be AWOL for a while, but I have several holiday recipes to post in the next few days. Also, will probably be updating my health saga on a separate page, since of course there's a new development on that front as well.

The good stuff: Gingerbread Marshmallow S'more's Cookies! Gluten-free, Sugar-free, Dairy-free, as always.  These were my favorite Christmas cookies this year- festive and quite delicious!

THE RECIPE:

Dough:

Look at that creaming action! So light! So fluffy!
1/4 c (non-virgin) coconut oil
1/4 ghee
3/4 c coconut sugar             
--> cream fats and sugar until mixture lightens in color and increases in volume (takes 5-10 minutes)
2 eggs
1/4 c brown rice syrup         
--> add wet ingredients, mix thoroughly

1 1/4 c teff flour
1 c millet flour
1/2 c tapioca flour
1/2 c gluten-free oat flour     --> combine flours

2 tsp ginger
1 1/2 tsp baking powder
1/2 tsp cinnamon
1/2 tsp nutmeg
1/2 tsp salt                          --> add other dry ingredients to flour mixture

Add dry ingredients to wet ingredients; mix thoroughly.

Roll out a portion of cough between two sheets of waxed paper, until 1/4 to 1/8 inch thick.  Cut with your favorite cookie cutters.  Grease cookie sheets with an acceptable oil/fat, or line with parchment paper to prevent cookie-sticking.

The un-broken (aka, un-eaten) batch.
Bake at 350 for ~6 minutes, or until top of cookies just begins to be firm to the touch.  They won't brown much, so don't wait too long to take them out!

If you didn't use parchment paper (which I did not), use a metal spatula to remove cookies immediately from sheet. If you wait til they cool (or the usual 10 minutes), they will stick and break! And then you will be forced to eat stomachfuls of headless, armless gingerbread girls to destroy the evidence.

At this stage, cookies can be eaten as-is, OR they can be TAKEN TO THE NEXT LEVEL and s'more-ified.


S'MORE-IFICATION:

You will need these two essential components:


Two gingerbread girls: one light, one dark...
1. vegan marshmallow fluff   (ingredients: brown rice syrup, guar gum... plus MAGIC)

2. chocolate filling/frosting:   (extra can also can be used as truffle shells!*)

4 oz unsweetened solid chocolate
3/8 c coconut sugar
3 tbs agave nectar
2 tbs coconut oil    --> use a double-boiled to melt chocolate over medium heat, then mix in other ingredients.

S'mored!

Take two cookies of corresponding shapes. Spread marshmallow fluff over one, and chocolate over the other-- then BAM sandwich them together.

Decorating options based on how lazy you are feeling:

Pretty Lazy - dip a toothpick into chocolate filling and 'paint' chocolate onto cookies
Medium Lazy - put chocolate into a piping bag, and pipe on decorations
Zero Lazy - make some other frosting, all-natural-food-color it, etc., and knock yourself out.

 
S'mored AND beautified. Check out Slutty New Year's Dress Girl on the left there.

* To use this as truffle coating:

Option A, and Option B. Option C? Eat that chocolate plain!
a) use silicone ice-cube trays, preferably pre-greased with coconut oil, and coat with chocolate. Add a dollop of whatever filling, then cover that with a layer of chocolate. Place in freezer to set, then move to fridge. (They will look pretty!

b) use waxed paper - place a 1cm-to-1inch sized dollop of chocolate on waxed paper. Then dollop your filling on top of that, and then seal it all in a final coat of chocolate. Place in freezer/fridge to set. (Lots of dollops. And they will look lumpy.)


I used extra povitica filling for the inside of the truffles... this recipe will be up next! Stay tuned.


Sunday, December 11, 2011

Eating on Adventure: London, Dublin, Edinburgh

London!


Thanks to an awesome friend working in London, I recently returned from a 10-day UK adventure through London, Scotland, and Ireland. (It was incredible!) In addition to 14 powerbars, a bag of almonds, some prunes, a handful of fruit leather strips, a batch of chocolate almond butter cookies, some fruit, and a bag of protein shake, I was lucky enough to run into some pretty decent whole food restaurants abroad.  In particular, I ate at one raw restaurant (SAF London), one deli/bakery (Blazing Salads, Dublin), and munched a lot of wild blackberries along the road!  Otherwise, I only actually bought two additional meals- one grilled-fish and chips meal, and one potatoes and vegetables meal-- both in Ireland during day tours.

My thoughts on the food that I did find--


 1. SAF Shoreditch - City of London - http://www.safrestaurant.co.uk/
     my score: 4 / 5 stars

This is not aubergine manicotti. I found it online when I googled SAF. But it does look like the raw tacos that my companion ate!

I ordered the Aubergine Manicotti (£14.45): "Mixed herb cheese wrapped in marinated aubergine strips, dehydrated and served with putanesca, olive relish and semi-dried tomato."

It was good! Not the best raw food I've ever eaten (which would be the Present Moment Cafe in St. Augustine, FL), but still very much worth it. Even more telling, SAF passed the ultimate test: my sugar-and-meat-and-all-things-normal eating friend even enjoyed his raw tacos. Not bad!  The biggest downside to SAF was its distance from where I was staying in Central London. (It was about a 20 minute walk)

Oh- oh- and for DESSERT, I ordered a orange chocolate tart. It was also fair. A little too cacao-nib-y for my taste, but what redeemed it was the little orange-flavored spheres that topped it. Very molecular-gastronomy-y, and I don't remember what they're actually called... but cool!


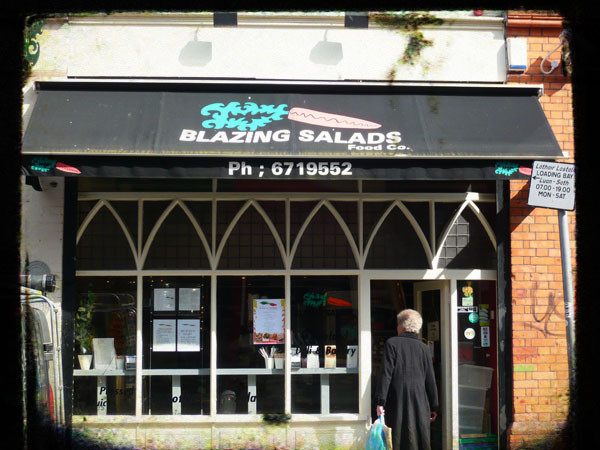
2. Blazing Salads: Dublin, Ireland
    5 / 5 stars

Image from The Vegan Post.
 This place was possibly the highlight of Dublin for me! It is a small family-owned deli, with a salad bar and bakery. The bakery was full of sugar-free, gluten-free, dairy-free concoctions! I stocked up for the next few days worth of meals/snacks and purchased: a brown rice ball stuffed with beans, a phyllo-esque wrap stuffed with nori/seaweed, an orange-date bar, and a cardamom-fig pastry roll. And then I figured what-the-heck, and added some Natasha's raw chocolate truffles for 1 euro each.  Everything that I had there was unique and delicious-- 100% worth the experience!  And of course it was a great way to blow my last euros before returning to London.


I was even so happy to find delicious, edible Dublin food, that missing my flight back to London didn't even upset me too much that evening. Because yes, that happened... silly AM vs PM confusion. But, 200e later, I was on a different flight nonetheless.


So, in summary- there exist places to eat abroad on a gluten free, sugar free, dairy free diet-- you just have to do your homework and know where to go. And if ever you are in Dublin, be sure to hit up Blazing Salads, on Wicklow St.